

”Texas, when is the last time you took a deep breath? Deep breaths can help re-center us and lower stress levels. You can learn about several breathing exercises in this week's article. We hope you find this helpful!
Reading time: 12 Minutes
MWi Hacks:
- Learn some great breathing exercises to reduce anxiety
- Reset your breathing to increase oxygen in your body to support your immune system
MWi Summary:
- This article discusses several techniques to regain control over your breath:
- Rock and roll
- Diaphragm extensions
- Cat and cow
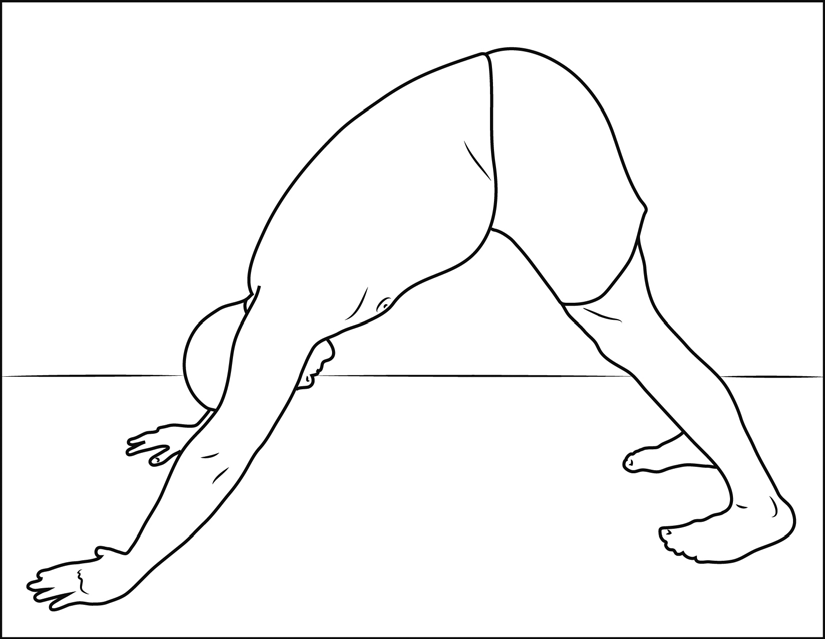
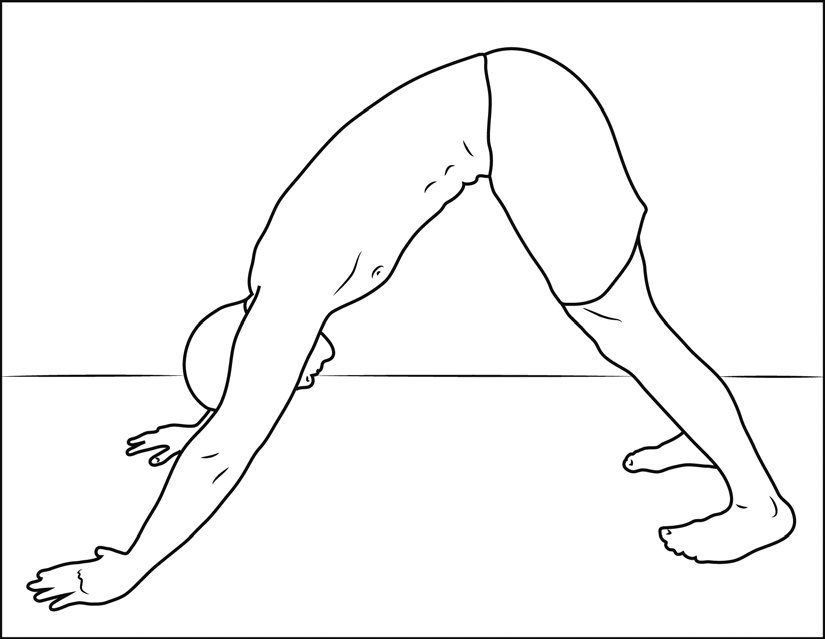
- Downward dog
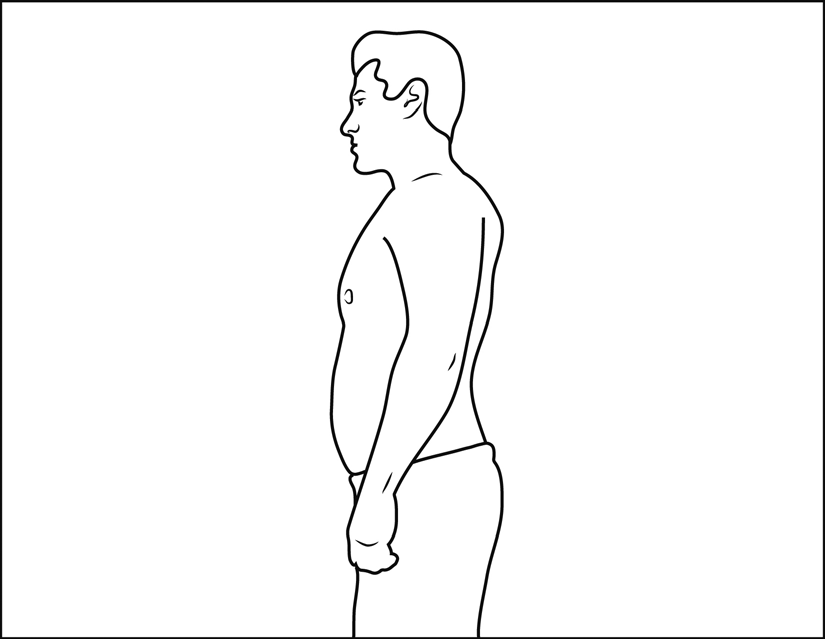
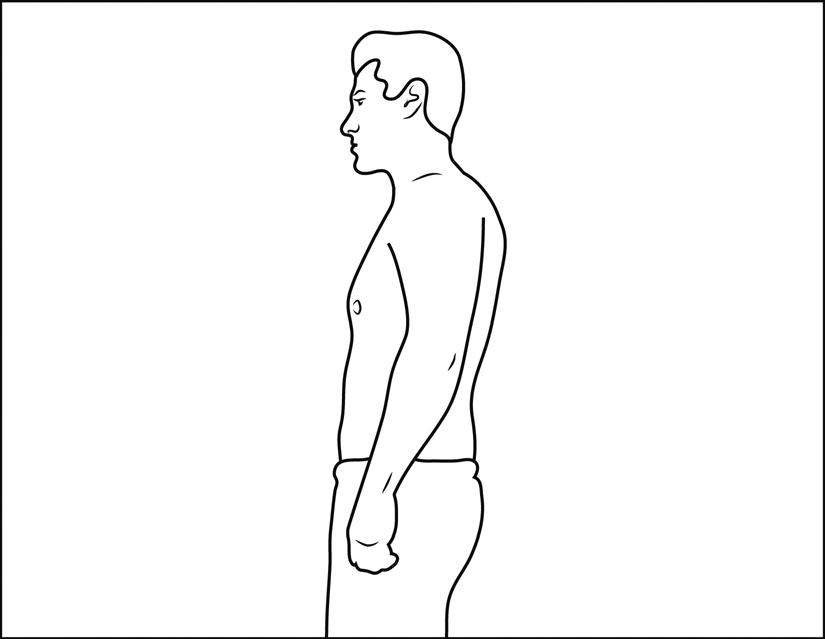
- Perfect standing breath
- It is important to focus on the quality of your breaths as you go through this routine.
- You can read the article for details on the techniques as well as other suggestions for how to calm yourself with your breath.
BREATHING EXERCISES YOU CAN PRACTICE
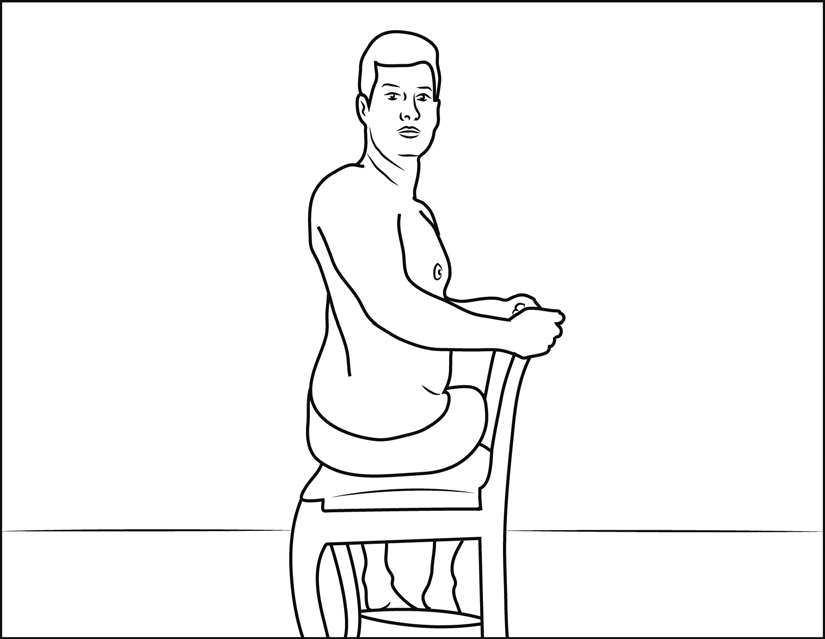
ROCK AND ROLL
Sit on a chair or cross-legged on the floor. If you’re sitting on a chair, don’t lean back against the chair. If you’re on the floor, make sure that you’re seated on a blanket or pillow to give you a little height. On the inhale, expand your belly as you lean forward. If you’re very thin, you may have to “push” your belly out to get the right posture in the beginning; if you’re heavier around the middle, the sensation is about “releasing” your belly or putting it on your lap. On the exhale, lean back as if you were slumping on a couch: con tract your belly, narrowing your waist, and exhale until you’re completely empty.
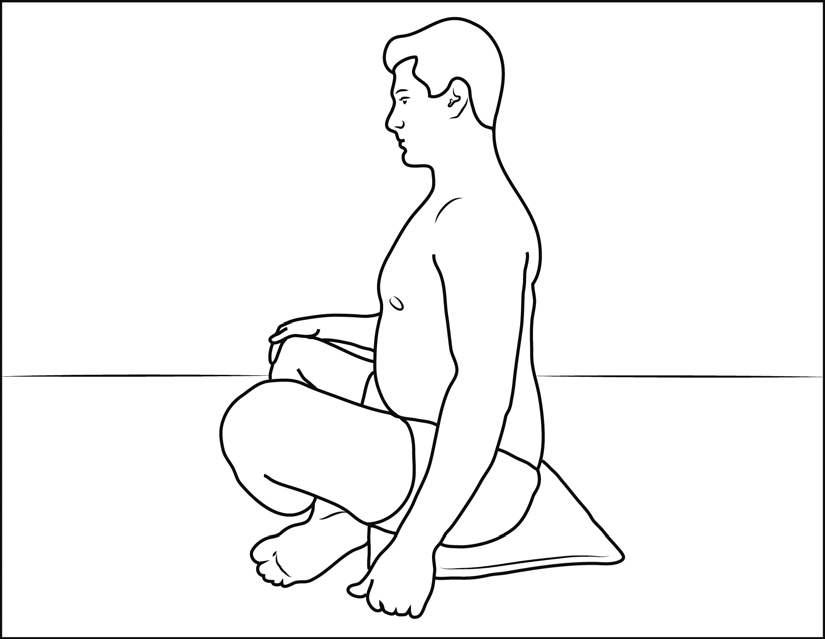
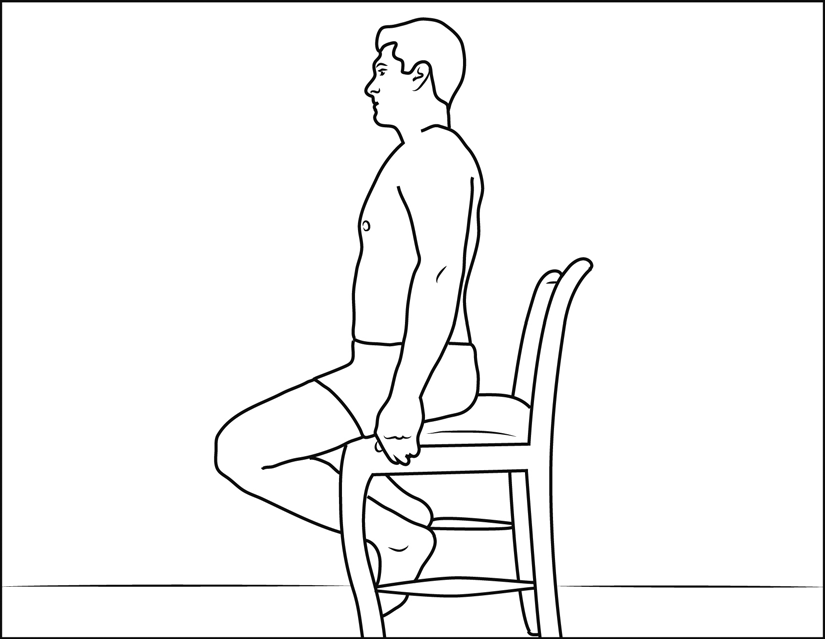
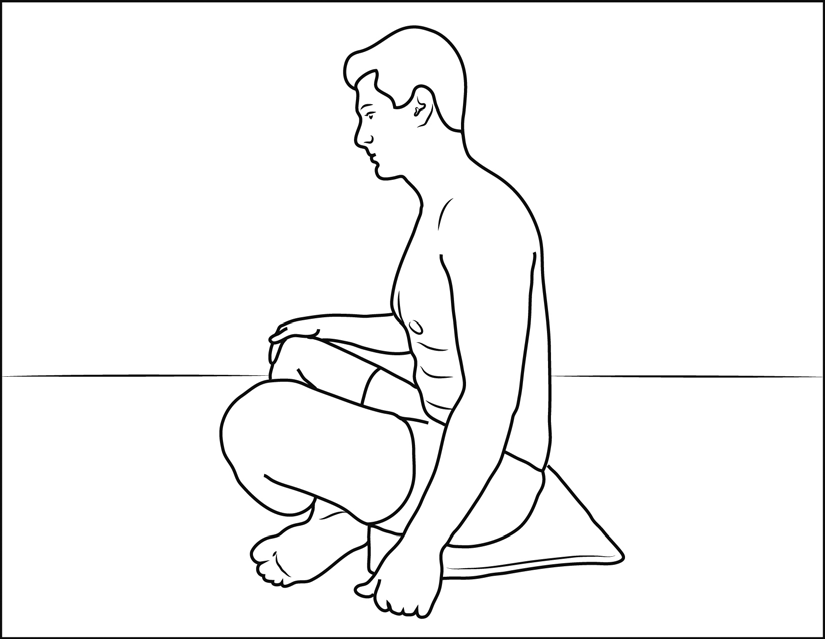
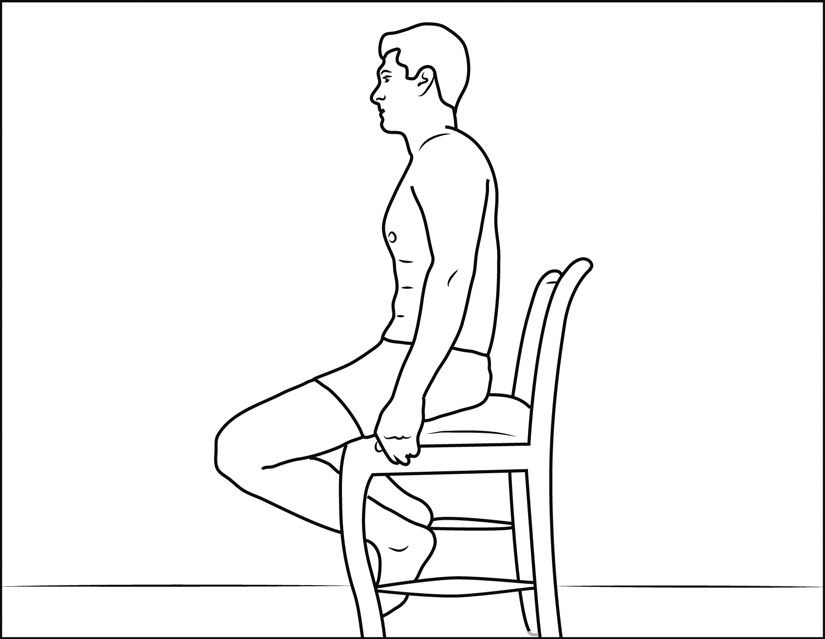
Right now, do 20 repetitions of this exercise.
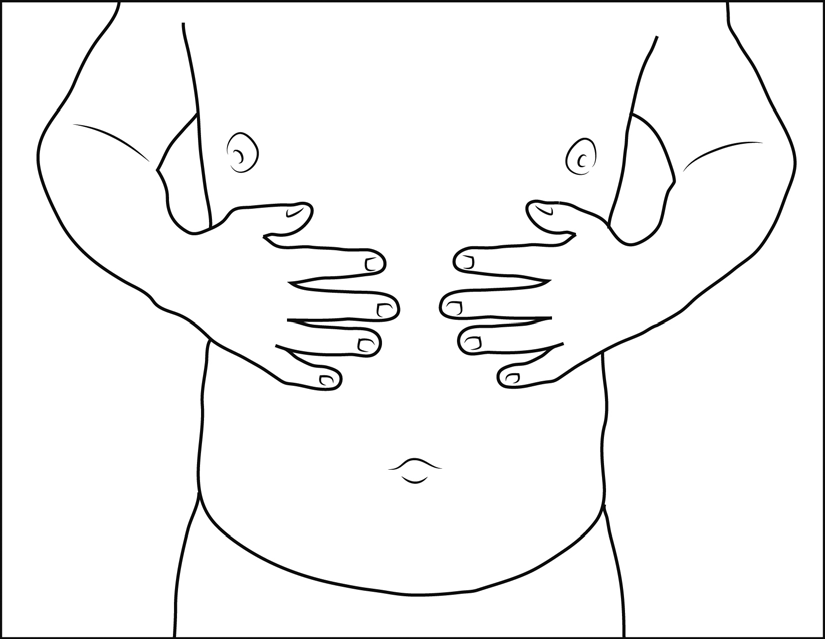
Two things that should be kept in mind when doing Rock and Roll are watching and listening to your body. In front of a mirror, watch your middle expand and contract while doing these exercises. Remember that you’re striving to be a Lower-body, Horizontal Breather, so your neck, shoulders, and upper chest don’t move; they stay soft and relaxed. An inhale now means your middle expands, and on the exhale, like a sponge, squeezes in. At first, this may seem like two unrelated movements—breathing through your mouth and moving your middle—but soon they’ll be synchronized and it will feel normal. Remind yourself that this less-than-sexy belly bulge movement will actually strengthen your core and middle and help you lose belly fat in the long run (plus, remember that we’re doing the exaggerated version now while you learn; later, it will be much more subtle).
Listen to yourself so that you aren’t holding your breath at the end of the inhale or the exhale. Keep in mind that every time you move your belly, you’re actually “teaching” your diaphragm (which is right above your belly) to get activated when you breathe. Be ready for the sensation of “I’ve got it! Yes, this feels right!” to wax and wane. It will get to the point where it feels normal. Why? Because you used to breathe this way and your body wants to breathe this way again (that is to say, with the muscles it was given with which to inhale and exhale, rather than with your shoulders).
FREQUENTLY ASKED QUESTIONS
Do you have to visibly rock forward and back?
Yes, in the beginning. This movement keeps the breath low in your body, and lets you start doing other things (e.g., talk ing on the phone, reading) at the same time. The hip move ment helps keep you in a Lower-body Breath. Later, the rocking will be very subtle—just a slight, undetectable hip pivot will be enough—but for now, really move back and forth, horizontally, so that the whole concept of Horizontal Breathing sinks in.
Why don’t you start by teaching me to breathe stand ing up first?
Standing and breathing is actually more difficult. Plus, right now we sit much, much more than we stand, so learning to breathe while sitting is more useful. The standing breath is one that we’re going to refine in steps, integrating the center of gravity, posture, and pelvic floor. You’ll end up with perfect posture and perfect, healthy, beautiful breathing that will fuel your body and brain.
Will these exercises actually strengthen my core?
The abs exercises you do at the gym are usually ones related to your developing a six-pack. The muscles you use in exhal ing are deeper core muscles. I’ve found that the athletes and gym enthusiasts with the most pronounced abdominals often don’t have good exhale muscles, and even they are surprised when during Exhale Pulsations, an exercise we’ll learn soon, they tire quickly.
You said belly breathing “teaches” my diaphragm to move. When did it forget?
When you were younger, your middle would expand and contract as your diaphragm pushed your ribs open and closed. When you started suck ing in your gut and bracing your middle it got stuck, and yes, even temporarily paralyzed. Right now, we’re “nudging it awake” until you’ll be able to move it on your own.
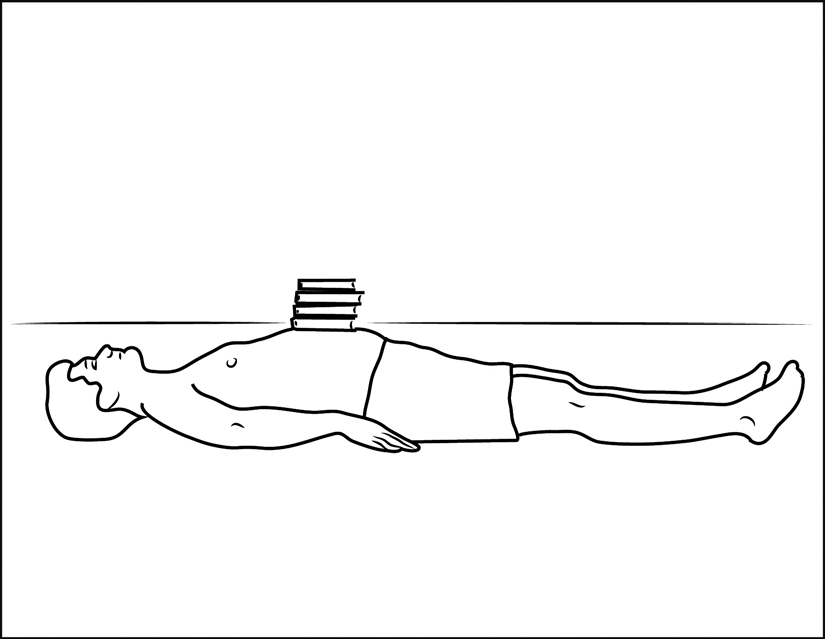
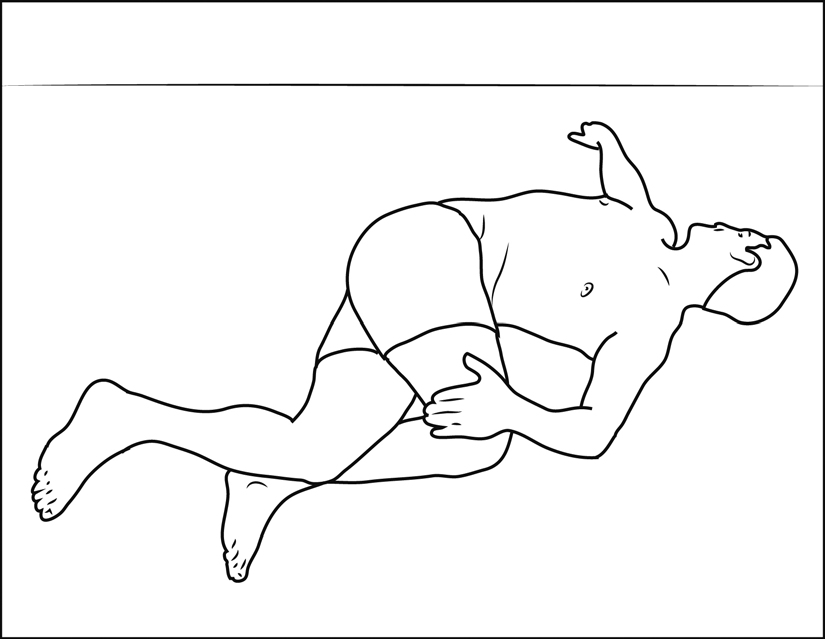
DIAPHRAGM EXTENSIONS
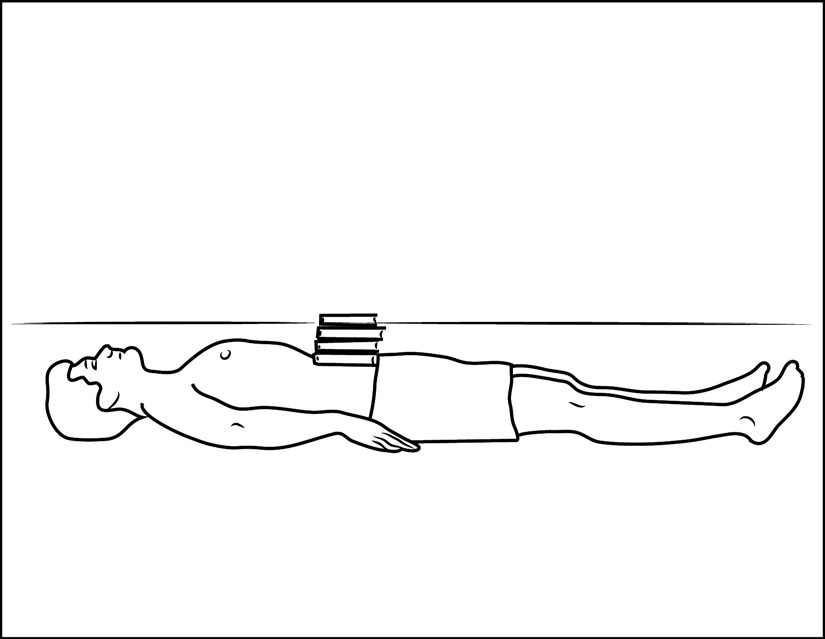
Lie down on your back. Place a large book (or a small stack of small books) on your abdomen, right on top of your belly button. Gaze toward the books—you should be able to see them at the very bottom of your field of vision. Take a belly breath with the goal of making the books rise, and on the exhale, watch them lower. You might find that your hips rotate slightly as you breathe, your lower back coming away from the floor slightly on the inhale. Bring aware ness to and even exaggerate this movement. Go ahead and do 50 repetitions. Don’t worry about your pace or counts right now; focus on getting used to the movement.
As you get better at this exercise, you can graduate to heavier books or use a ten- or twelve-pound weight or kettlebell. When using a weight, hold it with one hand and move it to different parts of your middle: 2 inches above your belly button, to the right, then to the left. Keep holding the weight, but focus on pushing it away on the inhale and letting it drop toward you on the exhale. Really let this idea sink in: when you breathe, your middle moves, in both directions, always. Go ahead and do 20 repetitions in 5 different places on your middle.
Now, let’s look at the exhale part of this exercise. If you’ve really got it and are using a heavy weight, focus on letting the weight fall fully down into your body on the exhale, seeing how far you can narrow your waist. The heavier weight will help you achieve this. (This will make the “push up” that comes with the inhale more challenging, but the focus right now is on the exhale. Be careful not to hold your breath or brace). Remember: Let the weight push your belly button down toward your spine. Put the weight aside and see if, when you sit up, you can keep that hollowed out “C”-shape on the exhale. That’s your goal.
FREQUENTLY ASKED QUESTIONS
I’ve heard that my diaphragm contracts—is that on the inhale or exhale?
Forget the word “contracts”; it confuses everyone. Right now, just think that on the inhale, your diaphragm flattens and pushes your ribs open, so that your middle should widen. And then the opposite, on the exhale. It curls closed and narrows your ribs.
Isn’t this going to make me gassy?
While this is called a “belly breath,” the fact is that air isn’t going into your stomach at all. It’s still going to your lungs, but now going to the bottom of your lungs, closer to your belly. The bottom of your lungs is where the densest, biggest lung tissue is, where the most exchange of oxygen happens.
What do I do if I find that I get distracted but am continuing to do the correct movement?
This is good news. It means you’re starting to acclimate to the new information and don’t have to focus as much. Bravo!
What happens if I really can’t “get” one of these exercises? Am I doomed to be a Vertical Breather forever?
Be gentle with yourself. Remind yourself you’ve had the bad habit of breathing vertically for years, maybe even decades, which means you’ve been breathing “wrong” thousands, yes, millions of times. Besides, this method is designed so that you have to find just one exercise that comes easily and work from there—you don’t have to be able to “get” all of them initially. The bright side is that your body “wants” to breathe horizontally, and soon will have moments when it “remembers” doing it when you were young.
CAT AND COW
Get on your hands and knees to do this movement, often called “Cat and Cow” in yoga. Cat should resemble a Halloween-like hissing cat, with its back arched. Cow is the same, with an all-fours posture, but with your belly relaxed and hanging low, and your head positioned up as if you’re mooing.
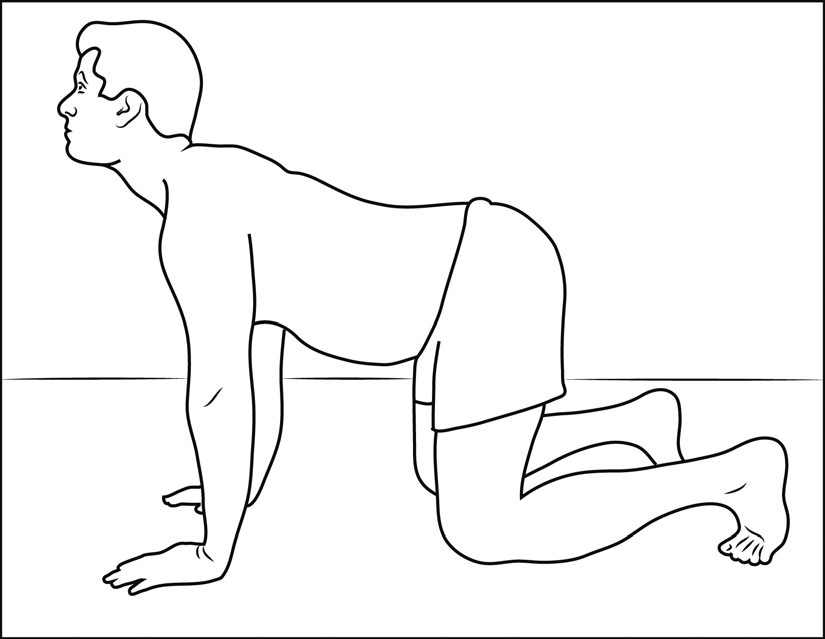
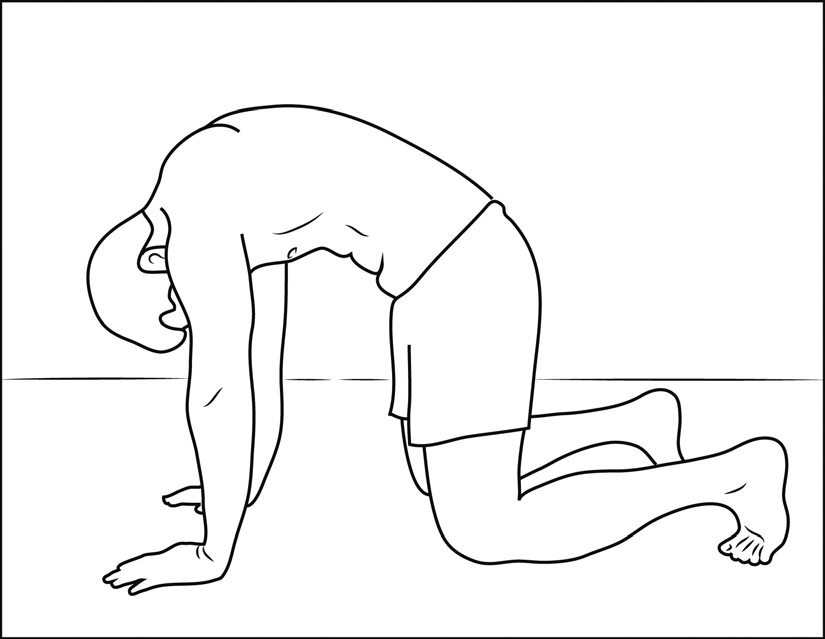
Now, exhale audibly and round your back up into Cat. Then ex hale more, simultaneously hollowing out your belly and blowing air out toward your belly button. Make sure your head is dropped completely, and you’re stretching the back of your neck. Your tailbone should be tipped under. On the inhale, drop your body, relaxing your belly and letting it expand downward toward the floor. Let gravity help. Your tailbone should now be tipped out. Swivel your head upward as if you’re looking toward the sky.
Do this 10 times right now, synchronizing the movement until it “flows” and you can easily rotate back and forth with each inhale and exhale.
Note of clarification: Your tailbone is your coccyx (it’s where your tail would be if you had one); it should be “tipped out” when you inhale and “tipped under” when you exhale. See if any of the follow ing helps you understand what “tipped under” on the exhale means:
-
When you’re sitting slumped on a sofa
-
When you’re in the Cat pose portion (exhale) of Cat and Cow
-
When you’re “flattening your butt,” squeezing your glutes gently
If it still doesn’t make sense to you, lie on the floor and press your lower back into the floor. Notice the rotation in your hips: you’re tipping your tailbone under!
Your tailbone “tipped out” is the opposite:
-
It’s “bumping your butt back” (“selfie butt”).
-
It’s the arch in your lower back when you’re squatting at the gym.
-
It’s the curve in your lower back away from the chair seat on a Rock and Roll inhale.
DO THIS
When you’re lying on the floor, create space between the floor and your lower back on the inhale. You should be able to slip your hand in between your lower back and the floor on the inhale.
FREQUENTLY ASKED QUESTIONS
How do I “let go” of my belly?
Make sure you’re relaxing your hips, glutes, and thighs. Really focus on “softening” them. This will trigger your abs to relax so that you can expand better. (You might also try these exercises in a pool or hot tub: holding the side of the pool with your belly pointed down- ward, use gravity and the weight of the water to help you relax and expand your middle on the inhale.) Now, from Cat and Cow, sit back on your feet for a second and do Rock and Roll seated upright. Notice how the movement is similar!
What does “bumping your butt back” mean?
When you tip your tailbone out on the inhale, make sure you’re releasing your belly and expanding it at the same time. Often folks will “bump their butt back” and simultaneously suck in their gut—which is not what I want you to be doing. Inhale, pop your butt back, and let your belly go.
When on the inhale I focus on really letting go of my stomach, down to the lowest muscles between my hip bones, it doesn’t feel natural and I don’t feel the two extremes. Am I doing something wrong?
Check your Cat and Cow position: Your hands should be right under your shoulders; arms (especially elbows) and legs stay at perpendicular stable positions. You should not move back and forth; rather, you should move up and down. Let your head drop on the exhale—really relaxing and stretching the muscles on the back of your neck. On the inhale, stretch the front of your neck up, sipping air above and in front of you (air from the sky). It will take some concentration and practice until you can completely feel the two extremes—a total relaxing on the inhale and a squeeze and emptying out on the ex hale. Not only is this a good stretch, but you get a lot of joint rotation that helps keep the joints in your hips and back lubricated and healthy. When you get more advanced, you might add Kegels and Reverse Kegels to this movement.
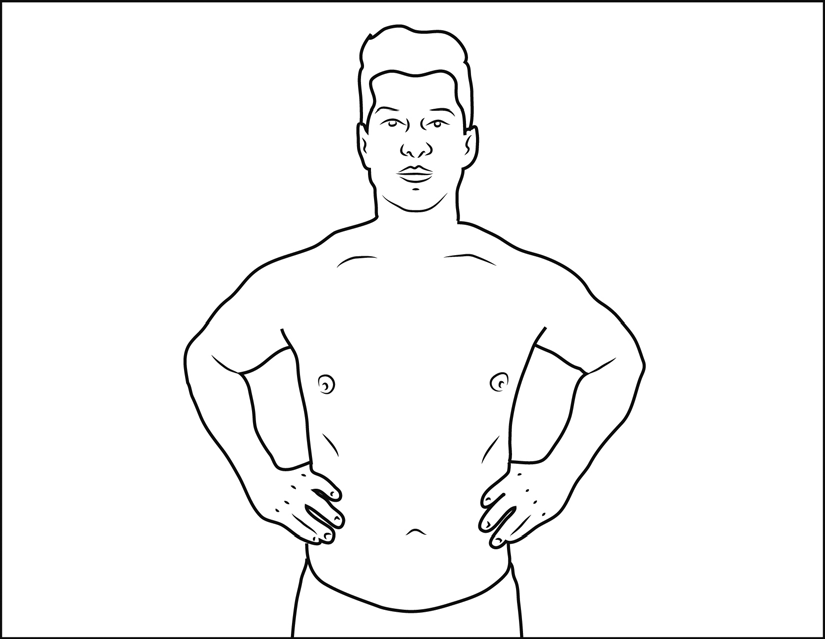
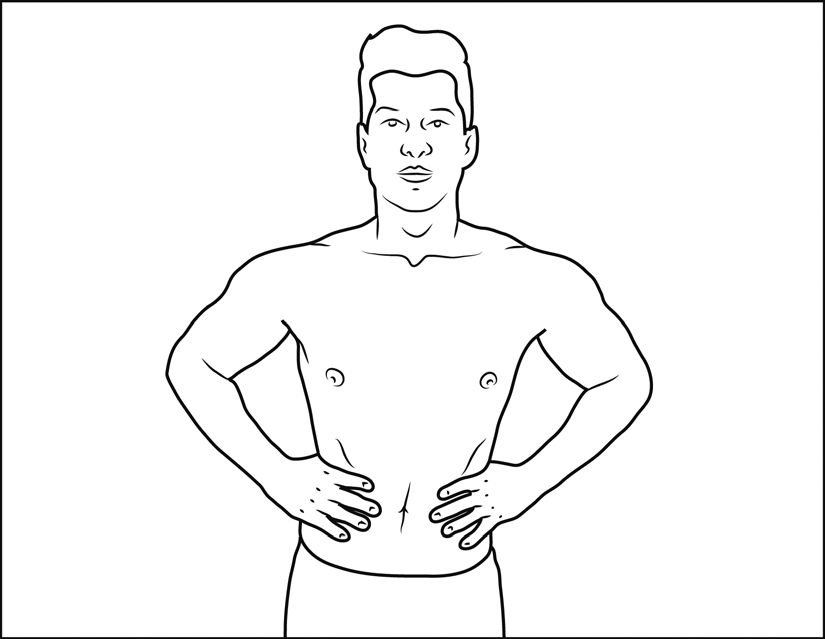
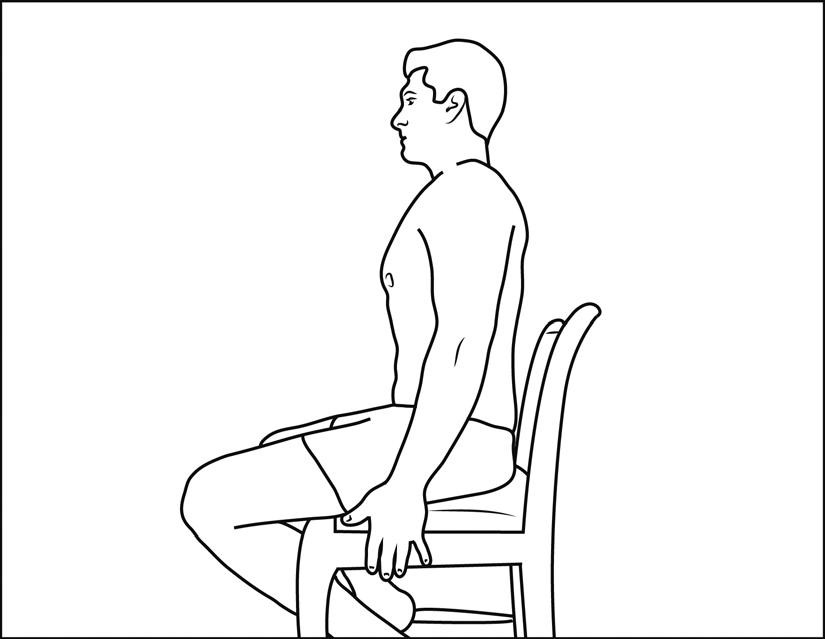
THE PERFECT STANDING BREATH
Change to a standing position and breathe the same way, but now with your arms at your sides. Make sure your shoulders do not engage in any way. Think of your arms as deadweights, heavy and immobile. This is best done standing sideways at a full-length mirror. Your neck, chest, and shoulders shouldn’t move; only your belly and pelvis should be moving back and forth. As you let your belly expand forward, you should be arching your back a bit (your butt pops back slightly). On the exhale, contract your belly, feel your lower abs tighten, and tuck in your butt (and you might give your glutes a slight squeeze to learn the movement).
Breathing this way is anatomically congruous; Vertical Breathing is not—you’re going against the way your body and organs were built. A Lower-body Breath that expands on the inhale is a healthy breath. Tune in to how you’re feeling; you’ll find it feels right. You’re not imagining it.
BREATHING SEQUENCE
Practice these four exercises in a sequence. This whole sequence should take from three to ten minutes.
-
Do Rock and Roll 20 times (seated on the floor or on a chair).
-
Roll over, lying on your back now, and do Diaphragm Extensions 20 times with a stack of books or with a weight.
-
Roll over and push up onto all fours. Do Cat and Cow 20 times. Sit back on your feet momentarily (or come back onto a chair) and do 20 Rock and Roll Breaths again.
-
Stand up and do the Perfect Standing Breath 20 times.
-
On the inhale, you should be thinking two things: Lower- body Breath and expand. On the exhale think: Lower body Breath and squeeze/contract. Remind yourself: “Inhale . . . expand. Exhale . . . squeeze.”
Now that you know the mechanics, work on the quality. Most people have lazy inhales and even lazier exhales. Put some oomph into the two, and you’ll expand your lung capacity by emptying out better as well as refilling with more air.
In addition, two subtle but very powerful benefits: an internal massage for your organs and a better flush of toxins from your body.
You’re now using the biggest, densest part of your lungs and really exhaling well. A word of caution: in the beginning don’t do these exercises while driving or running on a treadmill.
Do the Breathing Sequence twice a day and remind yourself as of ten as you can throughout the day.
FREQUENTLY ASKED QUESTIONS
This seems so long and drawn out—why don’t you just instruct us to “take a belly breath”?
We go through this sequence because just telling you to do a belly breath isn’t going to change your habit of breath- ing vertically. In order to change something you’ve been doing for decades (you are a complex organism!), your brain has to understand how you got here, why you should change, and actually feel the results. It has to make sense intellectually and kinesthetically.
What happens when I sleep—do I go back to my old bad patterns?
Due to the fact that it’s hard to breathe with an Upper-body Breath (UBB) when you’re prone, most people go to a partial good Lower-body Breath when sleep ing. Unfortunately, it doesn’t make up for the long days of bad breathing and bracing (especially since most people aren’t really sleeping as much as they should).Yes, ten minutes a day is the minimum. If you’d like to do two sets of ten minutes each, or add a couple of five-minute sessions throughout your day, go for it! As with anything, more practice means you’ll get results faster and it will “sink” in better.
I find that I “get it” for a little while, then I “lose it” and feel confused as to what to do.
Pause, slowly cue yourself, and do it again. Do this watching yourself in the mirror, then alternate, closing your eyes and seeing if you can do it with out a visual cue.
I get a little dizzy doing this. Is that okay?
Enjoy the light-headedness and buzz; there’s no hangover! Think about how much more air is coming in and going out of your body.
Now that I’m used to it, my workout is only a couple minutes a day, but is more better?
Yes, ten minutes a day is the minimum. If you’d like to do two sets of ten minutes each, or add a couple of five-minute sessions throughout your day, go for it! As with anything, more practice means you’ll get results faster and it will “sink” in better.
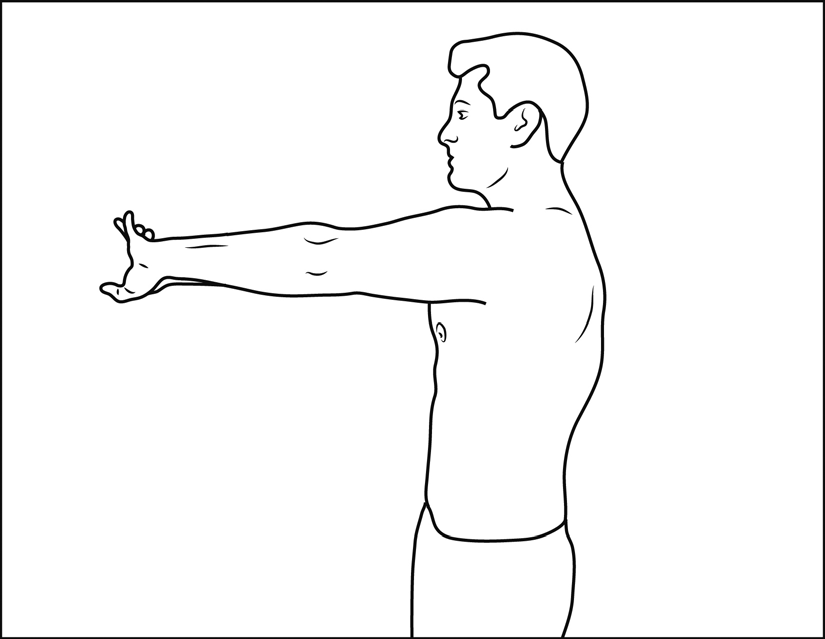
INTERCOSTAL STRETCH
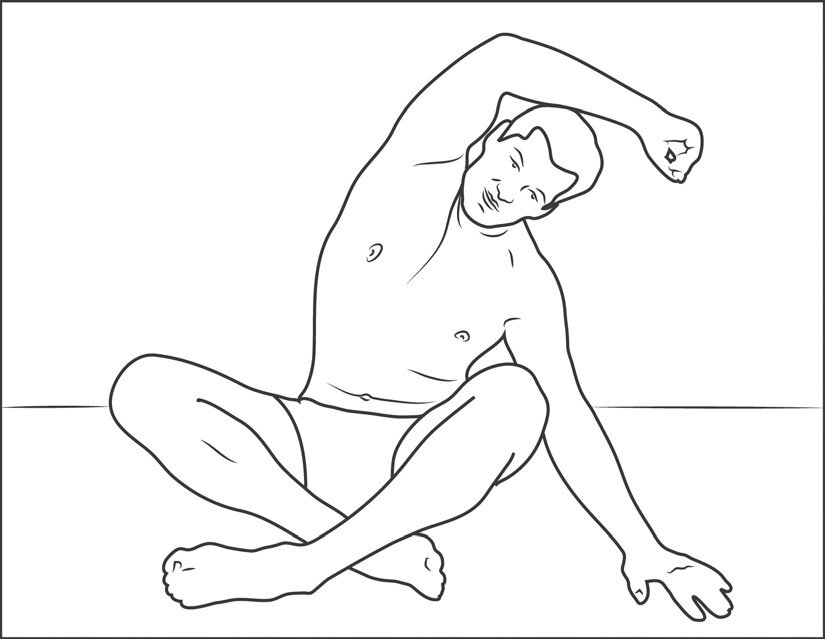
Sitting up straight, drape one arm over your head so that the bicep is covering your ear. Visualizing the little muscles in be tween each rib on your side, stretch in the opposite direction, keeping your elbow straight up. Watch yourself in the mirror and make sure the majority of the stretch is not coming at your armpit. You might hold your side with your opposite hand just to give yourself some tactical awareness of where you want to be stretching. Do not hold your breath. Inhale during the stretch and exhale when you relax a bit or straighten up. Then reverse sides.
Think of the intercostal stretch as a side belly breath. Your diaphragm can expand on the sides; this stretch is helping to activate that as well.
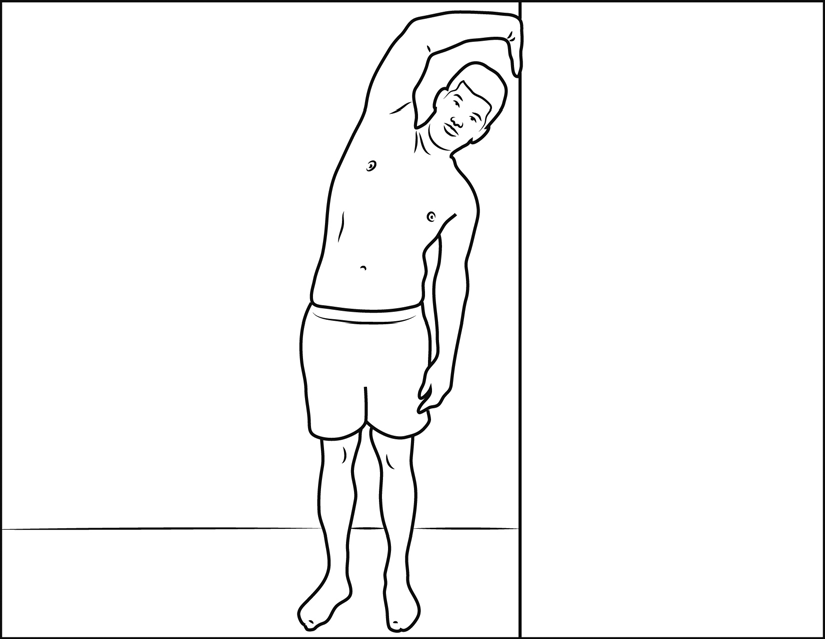
The intercostal stretch can be done standing next to the wall as well, with one palm on the wall.
Inhale and “open” your side. Move your feet closer to or farther from the wall to find places at your side that feel tighter. The arm closest to the wall should stretch down toward your knee as you feel the stretch in your rib cage.
Now lie down on your side with one arm resting along the length of your body and do this exercise. Does it feel as if you’re pushing that arm up on the inhale? Even if it’s subtle, if this resonates with breathe through the middle of your body, where the densest part of your lungs are, with your diaphragm, the way you’re meant to. Bravo!
After you have done this exercise, take a deep breath, with awareness on the inside of your arms between your armpits and elbows. The parts that touch your sides. Notice how you can feel your sides expand. “Play” with this new sensation by doing the breathing exercises in different positions.
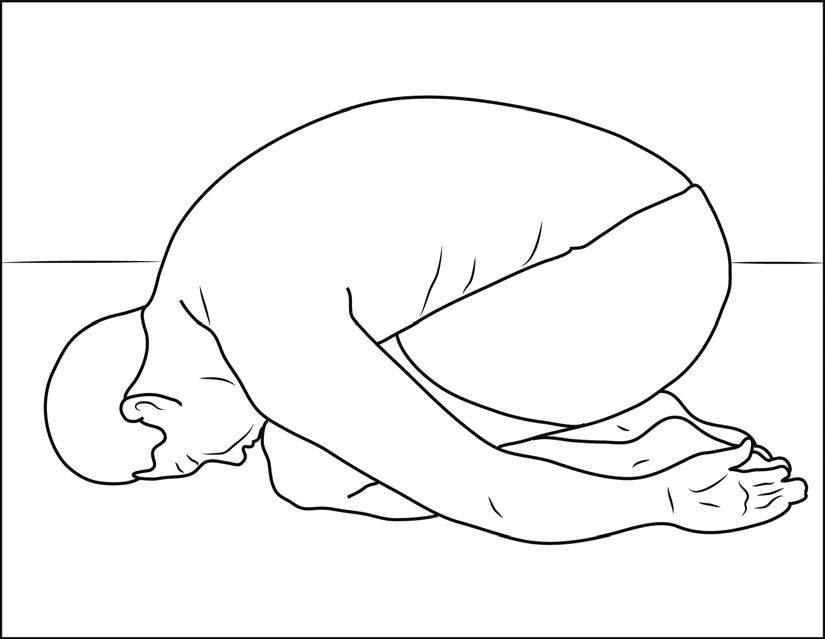
NEXT STEP
Then, do the Child’s Pose to bring awareness to your back. Re member, your chin should almost fit between your knees; keep your arms back with your shoulders “melting” down as you relax with each breath. If you have difficulty pointing your toes back, dropping your head low enough to get to the floor, or trouble with your lower back, try a supported Child’s Pose: put a rounded pillow or bolster vertically from your tummy to your head, or between your calves and butt to lessen the pressure if you are still too stiff or need the extra support. Inhale and puff up your back, exhale and flatten your body.
FREQUENTLY ASKED QUESTIONS
Shouldn’t I be exhaling as I stretch, like I do with other stretches?
No. You want to fill the space with air and then stretch, so that the muscles inside have to give a little more. It does feel counterintuitive in the beginning, but if you keep the image of these between-the-rib muscles in your mind’s eye, it will make sense to you.
Will I be breathing more into one lung when I do this?
Yes, and the reason is that your breathing might feel slightly restricted, as compared to a “front” belly breath.
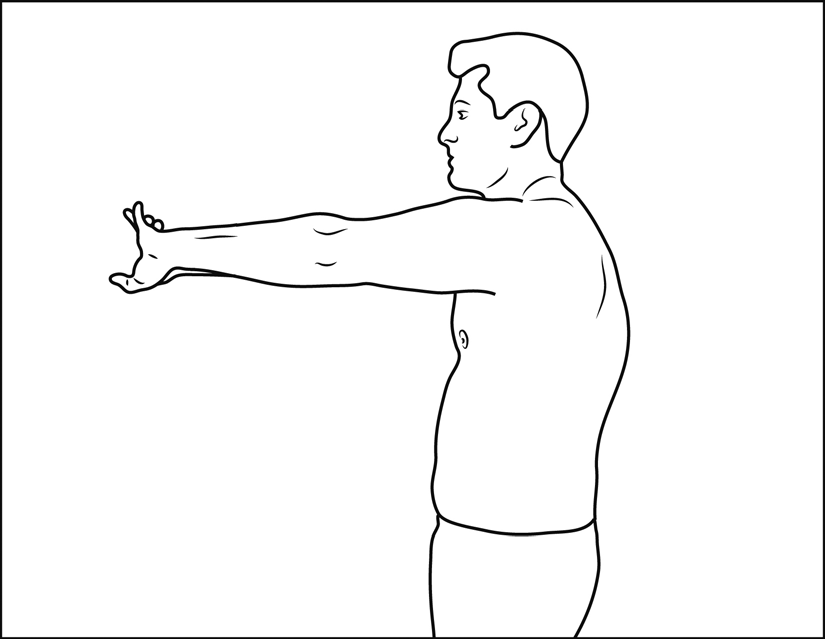
V-BACK OPENER
Round your back, extending your arms in front of you. Inhale. Clasp your hands together, palms facing out. Drop your head. Focus on increasing the gap between your hands and your chest, feeling your shoulders stretch across your back.
Become aware of Lateral Breathing—the expansion of your thoracic cavity from side to side that you will feel when you cross your arms in front of you, putting your hands on your sides or your hands in opposite armpits, as if keeping them warm—notice the expansion of your back and sides when you breathe, this exercise will change subtly.
FAQ: I feel like my ribs are moving a bit more now when I breathe. Is that okay? Yes. You’ll notice that subtly, you are moving from a belly breath to a real middle-of-your-body breath. This is good; it’s the goal. Your intercostals are very important; in fact, the beginner belly breath is really just the starting point for your feeling your entire middle mov ing without engaging your shoulders. External intercostals pull your ribs open for the inhale; internal intercostals close for the exhale.
FAQ: You talk about activating the diaphragm; when did it deactivate? It started when you started bracing your body, either as an emotional response or when sucking in your gut because you thought it was good for you. Little by little, your diaphragm got replaced by your neck and shoulder muscles, which would pull you up to breathe. Not to worry, though, because your understanding, stretching, and practicing the exercises now will get it back in gear, no matter how old you are.
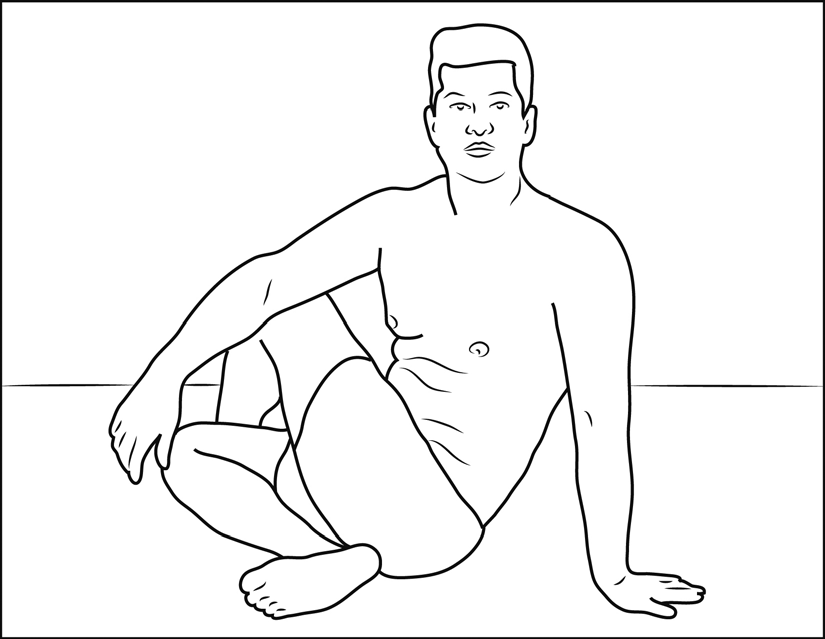
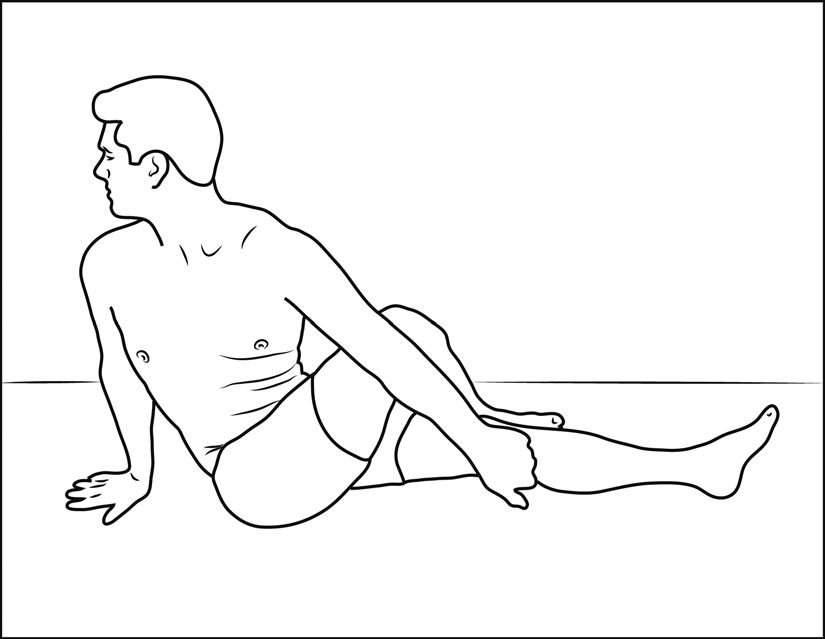
SEATED SPINAL TWIST
-
Sit on a folded blanket, legs straight out in front of you.
-
Draw your knees up close to your chest with both feet on the floor.
-
Drop your right leg down and then lift your left leg and place it over your right leg, knee toward the ceiling, left ankle by the right knee. Repeat on the other side.
-
Draw your right leg toward the body.
-
Inhale a Lower-Body breath, feeling your belly expand, and then, on an ex hale, bring your left elbow to the outside of your right knee as you twist toward your right.
-
Hold the pose for 5 to 10 seconds. Repeat on the other side.
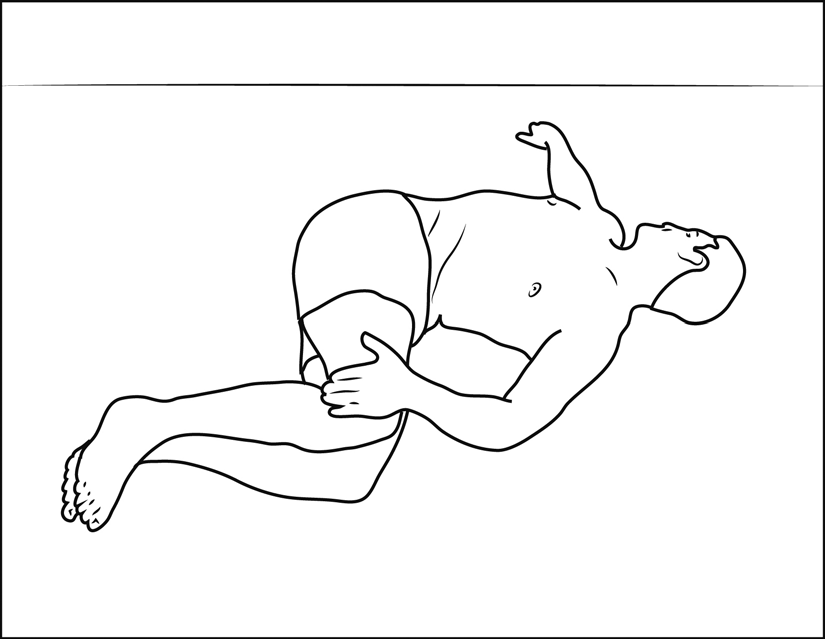
RECLINED SPINAL TWIST
-
Lie on your back, with your knees bent and your feet flat on the floor. You can rest your head on a pillow or blanket for extra neck support. Let your arms rest at your sides.
-
On an exhalation, draw both knees to your chest and clasp your hands around them.
-
Extend your left leg along the floor, keeping your right knee drawn to your chest. Extend your right arm out along the floor at shoulder height.
-
Shift your hips slightly to the right. Then, place your left hand on the outside of your right knee. Exhaling, drop your right knee over the left side of your body. Keep your left hand resting gently on your right knee. Turn your head to the right.
Try Simple Adjustments to Make Reclined Spinal Twist Relaxing:
-
Rest your top knee and leg on a bolster or firm pillow.
-
Place a folded blanket between your legs.
VARIATION
-
Cross your right knee over your left knee (crossing knee-to-knee). If you have the flexibility, also wrap your right foot around your left calf, coming into the Eagle Legs pose.
-
Shift your hips slightly to the right and drop your knees to the left.
-
Come back to center, then repeat on the opposite side.
Practicing Reclined Spinal Twist can be calming and comforting. Keep the follow ing information in mind when practicing this pose:
-
Bring your top knee over only as much as comfort will allow. If needed, rest your top knee on a bolster or pillow to decrease the range of motion.
-
Keep your breath smooth; do not hold your breath.
-
Rest the opposite hand on your top knee to gently add more weight.
-
Relax your shoulders away from your ears. Try to keep both shoulder blades on the floor.
-
Relax your abdominal muscles.
-
Never force your knee to the floor. Be gentle with yourself!
Be aware of how your back feels during the pose. If you feel any sharp, pinching, or jabbing pain, stop the pose and come out of it slowly. Never force the twist if you’re in pain.
SEATED TWIST
Sit sideways on a chair. Twist to the left so your torso is facing the chair back and grasp it with your hands. If your neck will permit it, complete the full spinal twist by looking over your left shoulder. Swing around to the right and repeat. Remember: twist at the waistline; resist using the chair’s back to wrench your body around further into the twist.
STANDING TWIST
Place a chair next to a wall. Bend the leg closest to the wall and place it on the chair. This time, when you twist, place your hands on the wall to hold yourself in a deeper position—but walk them back toward center if your back starts to protest. Re peat on the opposite side.
BENEFITS OF SPINAL TWIST
-
Therapeutic for carpal tunnel syndrome31
-
Relieve thoracic or mid-back spinal tension
-
Strengthen your abdominal oblique muscles
-
Stretch your hip rotators and hips
-
Lengthen, relax, and realign the spine
-
Massage your abdominal organs and stimulate digestion
-
Benefit the soft tissues that surround the spine
-
Enhance the health of the discs and facet joints between the vertebrae
TWISTS AND BREATH
Once you’ve mastered these twists, integrate the breath. There are several reasons:
-
Usually, when put in a restrictive position, you’ll go up to an Upper-body Breath. Now you want to teach your body that, no matter what, your breathing stays low. Yes, it’s tough to inhale and expand your middle and exhale and contract when pretzeled up and stretching. Do it anyway.
-
As your body is twisting and stretching, so are your lungs and organs. Breathing low while in a stretch helps to massage your organs at a different angle as well as to detoxify (think of wring ing out a wet washcloth).
-
Depending on which side you’re stretching, one lung is working harder than the other. This automatically will help expand your lung capacity to sections of your lungs you may not use much, or at all.
EXHALE PULSATIONS—CANDLE BLOWS
Exhale Pulsations are short, sharp exhales that work the muscles involved with exhalation. You might think of them as a pumping action. With this exercise, your abs move from neutral to concave (or at least to a concave feeling).
Your belly scoops in—even if you have fat around your middle that doesn’t naturally “go in.” It should feel as if the muscles are pull ing your belly button deeper into your body than ever before. Pre tend you’re blowing out a row of candles on a big cake that’s across the table. When you exhale through your mouth, let the air hit the back of your teeth in order to make noise on the exhale.
There are three important things to remember when doing Exhale Pulsations:
-
Don’t move your back. (Exhale Pulsations don’t have the same back-and-forth movement as Rock and Roll.)
-
Even though you do inhale a bit, the focus is on blowing out air; this is an exhale exercise.
-
Make sure both the abs movement and the exhale are in synch! Although you may want to go for bigger numbers, resist the temptation and focus on the quality. The inward scoop motion of your belly should happen at exactly the same time as you “blow out the candles.”

Mix it up: Try to do the exercise fast without losing the synchronicity of the abs squeeze and the exhale: slow down the “pulse,” holding the squeeze a bit longer, and making the exhale audible and powerful. If you’ve never done this before, it’ll help if you put one finger up at arm’s length in order to feel the exhale. This is an ab exercise that targets deeper core muscles and will enable you to exhale more effectively. Stronger exhale muscles and more conscious exhaling are very important because they create more space in your lungs for fresh air, thereby making your inhale more effective. When you exhale passively, you leave stale air in your lungs. By strengthening your exhale muscles, you will exhale better unconsciously.
More advanced: Blow harder between ten and twenty times, aiming for a place farther off in the distance. Make the exhale really audible. Exhale harder, with the goal of seeing a concave scoop in your middle when you stand sideways looking at yourself in a mirror. Blow out harder and squeeze your middle, narrowing it, harder. Slow down, so that the compression feels very intense and you feel a burn sooner. Try pulling your belly button as close to your spine as you can. Switch to your nose—this automatically makes the inhale and exhale harder, since your nostrils are smaller than your mouth.
https://www.thebreathingclass.com/breathing-through-covid19
More about the Expert:
A clinical psychologist and a leading expert in mental health and fitness, Dr. Belisa Vranich is the author of Breathe: The Simple, Revolutionary 14-Day Program to Improve your Mental and Physical Health (St. Martin’s Press/Hay House). She is the founder of www.thebreathingclass.com.Dr. Belisa has extensive experience working with first responders: firefighters, military and law enforcement for topics related to endurance, stress reduction, precision, pain reduction, and PTSD. A firm believer in the importance of giving back, she volunteers and supports numerous organizations related to veterans and animal rescue organizations in New York City and Los Angeles. Dr. Belisa is an outspoken advocate of organ donation and dedicated her first book to Liamslife.org